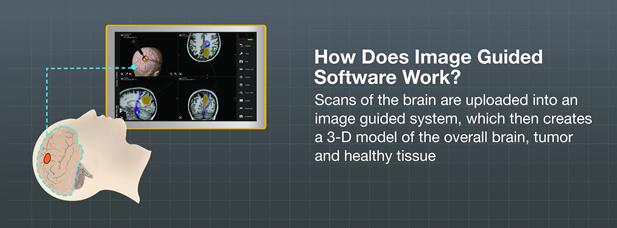
The following is a typical example of an image guided surgery treatment using ‘touchless’ patient registration technology.
Steps For Using Image Guided Brain Surgery
1) Treatment Planning and Patient Preparation
Your surgeon has uploaded your pre-operative diagnostic data to the image guidance system to get a personalized 3D model of your skull, brain, and critical structures. With this information, the surgeon plans the surgery by outlining the contours of your brain tumor, making sure to avoid the healthy tissue and any important structures near the tumor. Once the treatment plan is prepared, it is saved on the navigation system until being retrieved from inside in the operating room.
Once you arrive at the hospital, you are given anesthesia in preparation for surgery. When you are asleep and before your doctor makes any incisions, the area where the craniotomy will be performed will may be shaved and will be cleaned. In most cases your head will be immobilized so that you remain still throughout the procedure.
2) Patient Registration
A special laser pointer allows surgeons to register you to the image guided surgery system by scanning the surface of your face without touching it. This ‘surface matching’ process is an accurate1 and easy to use patient registration method that automatically calculates your cranial structure and aligns it to your 3D model on the computer screen. After your operating room position has been aligned with the virtual map created by the surgeon prior to surgery, the IGS system can track your brain and the doctor’s surgical instruments throughout the procedure and virtually in real time.
3) Craniotomy and Image Guided Brain Tumor Removal

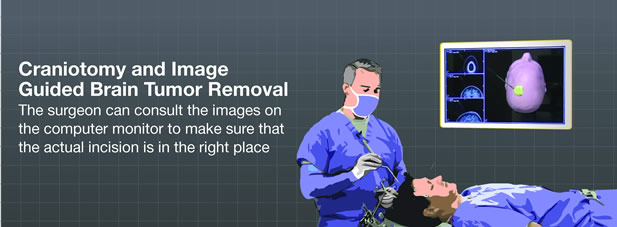
Based on the pre-planned navigation route, and once you are surgically draped, your doctor will perform the craniotomy as identified in the planning phase and guided by the neuronavigation system. The surgeon can consult the images on the computer monitor to make sure that the actual incision is in the right place (and at the right angle) as planned on the 3D brain model prior to surgery.
Once the craniotomy is completed, your surgeon will access the brain tumor according to the pre-planned trajectory, or route, while ultimately avoiding critical areas of the brain. At any time, the neurosurgeon can follow each of his or her steps on the IGS system monitor. Integration and tracking with additional instruments like a neurosurgical microscope or an ultrasound machine may give your surgeon additional visual guidance throughout your tumor removal. Your doctor may also use intraoperative imaging, an MRI or CT for additional control.
4) Closure
Once the desired goal of your surgery is achieved—partial or total brain tumor removal—the craniotomy is closed and you are brought to the recovery room. Since image-guided surgery with neuronavigation may reduce the invasiveness of the surgery, it is possible that you may return home only a few days after hospitalization, and return to everyday life. However, this will depend upon your surgery, your recovery and your physician’s recommendations. Depending on your tumor, your doctor may recommend chemotherapy or radiotherapy as a follow-up to your surgery.
Download image guided surgery steps PDF »
1 Raabe A, Krishnan R, Wolff R, Hermann E, Zimmermann M, Seifert V. Laser surface scanning for patient registration in intracranial image-guided surgery. Neurosurgery. 2002 Apr;50(4):797-801; discussion 802-3.